How to Customize WooCommerce Checkout Page (The Easy Way )
The checkout page is the last page a customer sees before they complete their purchase. It is also the most important page on your site because it’s where you collect all of your customer’s information and finalize the sale.
Customizing the WooCommerce Checkout Page can be done in a number of ways. The best and Easy way is to use the CartFlows Checkout page builder plugin to customize Woocommerce checkout page. This plugin allows you to customize the checkout page with your own design and text using Elementor and also gives you the ability to upsell and cross-sell any other products..
There are also WooCommerce extensions that allow you to customize the checkout page by adding a form, input fields, and more. but In this tutorial, I will show you how to customize your WooCommerce checkout page easily using Elementor.
Disclosure: I may receive affiliate compensation for some of the links below at no cost to you if you decide to purchase a paid plan. You can read our affiliate disclosure in our privacy policy.
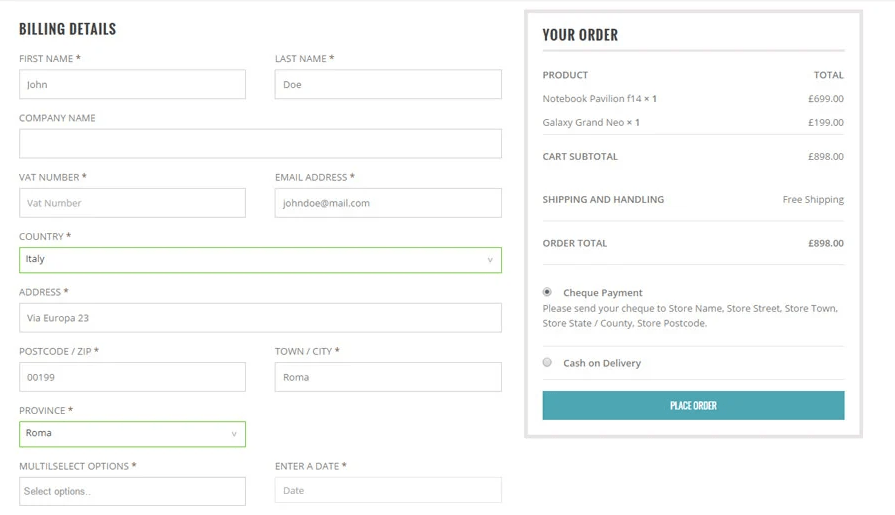
How will the customized checkout look?
Here I have designed a checkout page that took me 5 minutes to design using Cartflows and Elementor. As cart flows have pre-made templates that are professionally designed and you can customize them to your taste and color within minutes.
If you have tried to edit and customize the checkout page, then you have discovered that it’s nearly impossible to design it the way you want, and doing it the coding way is much more difficult, That’s Why we recommend CartFlows

Cartflows Pro integrates with your page builder and gives you the option to drag and drop your checkout page features and design and to add several other custom features like:-
- Cart Abandonment
- Analytics & Tracking
- Templates For Everything
- Dynamic Linking
- Conversion Tested Checkout
- One Click Order Bumps
- Unlimited Upsells / Downsells
- Checkout Custom Fields
- Global Checkout
Templates Are Made For
- Elementor
- Beaver Builder
- Divi Builder
- Thrive Architect
- Gutenberg (Planned)
Customize WooCommerce Checkout Page

Steps to Customize WooCommerce Checkout Page
- Download and Install CartFlows Pro
- Setting up the CartFlows Plugin
- Choosing your Page Builder
- Creating a Checkout Flow ( The Checkout Page )
- Changing the Default Checkout Page
- Creating an Upsell and Thankyou Page.
1. Downloading and Installing CartFlows Pro.
The first thing we need to do is to download CartFlows Pro. Click the below button to download CartFlows Pro.
After you have downloaded the plugin. Go to wp-admin > Plugins > Add New and Upload the CartFlows Pro plugin.
When activating CartFlows Pro, it will ask to install its base plugin Cartflows Free Version. Install the Free Version.
Then you need to set up the plugin which we have shown below in the step-by-step process.
2. Setting up the CartFlows plugin.
The CartFlows provide an interactive way to set up the plugin on 1st activation.
The plugin will guide you through a 5 steps process that makes the setup completely easy for non-techies
After installing cartflows you will get a popup like this

Click on the blue button ” Start Wizard” and start the settings process. It’s a 5 step process. So let’s get started.
Step: 1 – Welcome
The first page is a welcome page that welcomes you to the plugin and gives a small introduction on how this plugin can help you generate more sales from your eCommerce and help you customize your checkout page easily.
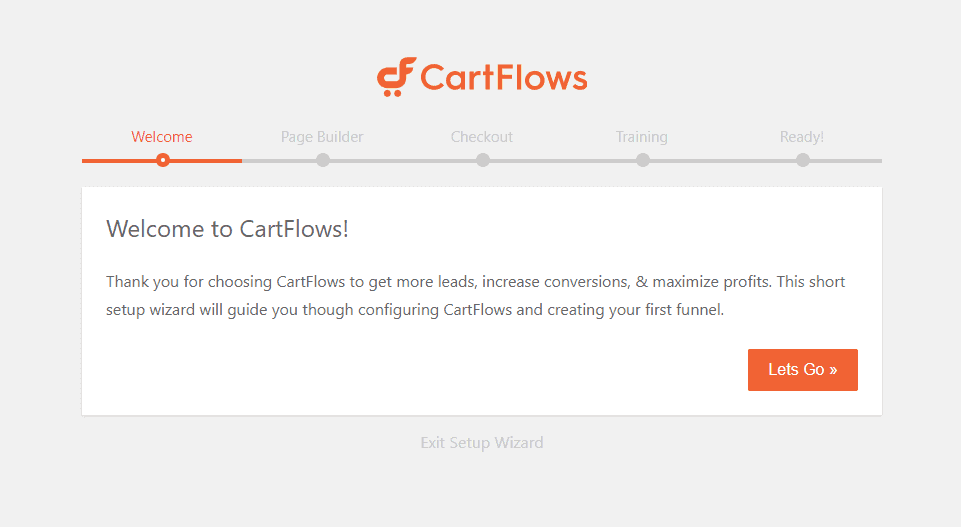
Just click the “Let’s go” button and proceed to the next step.
3. Choosing your Page Builder.
Now you will be asked to choose the page builder plugin that you want to use, If you are using any page builder plugin then select the one from the drop-down.
If you are not using any page builder then I will ask you to use Elementor as your page builder. Elementor Pro has great features that enable you to design, customize, and add functionality to your existing page and even create a new theme all by yourself.
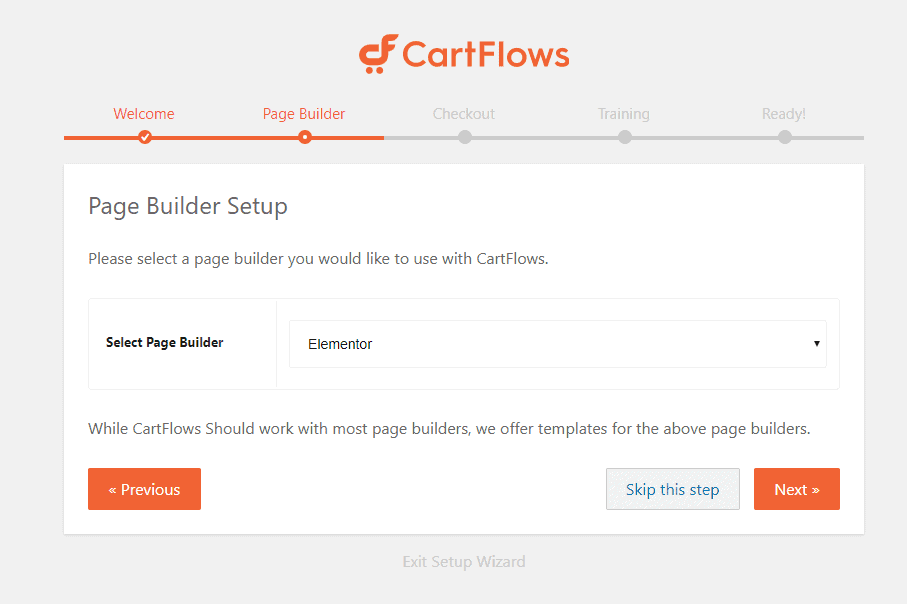
After selecting the page builder plugin, click on the “Next” button.
Step 3, Choosing your eCommerce Plugin
Cartflows recommends you to use and install the recommended plugins like WooCommerce, and WooCommerce Cart Abandonment Recovery.
You need to install and activate those recommended plugins for cartflows to work properly. The plugins will automatically install and activate when you click on Yes.
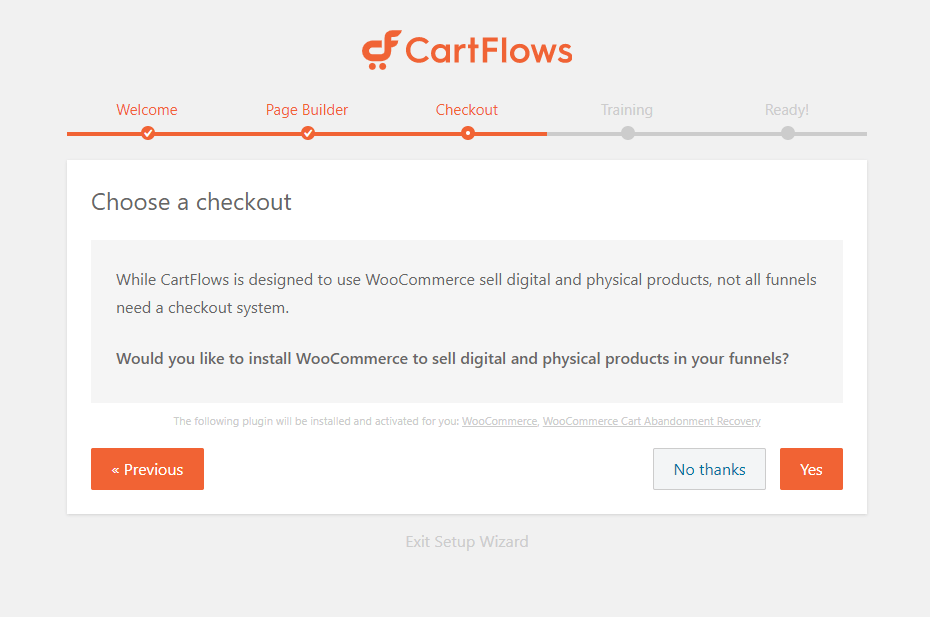
Click on the “Yes” button and proceed to the next step.
Step: 4 – Training
In step 4 they offer free training, which I think you don’t need as we have covered in detail how to customize the WooCommerce checkout page Elementor.
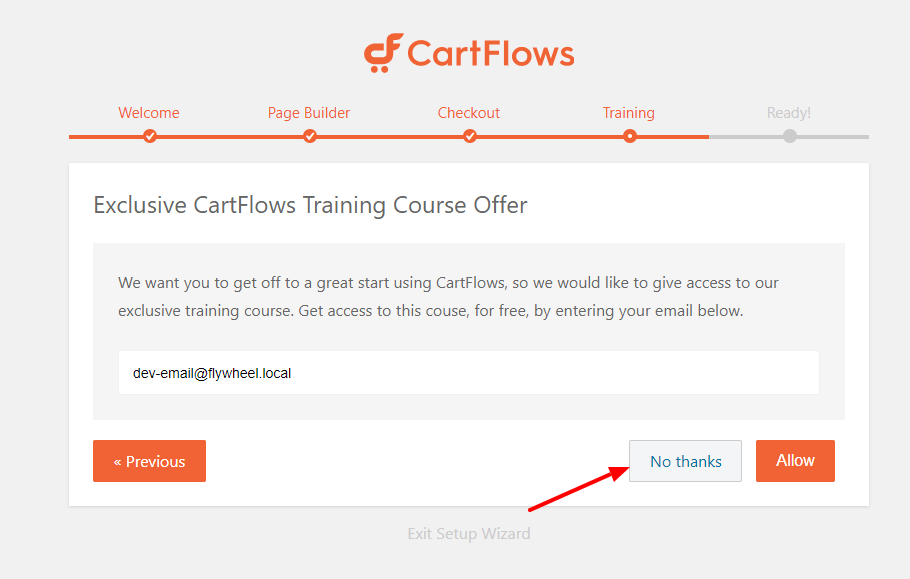
Click on “No Thanks” and proceed to the final step.
Step: 5 – Final and Ready
Now everything is done and ready to be used.
Now we will create our first flow. Flow is a funnel for your sales page. In simple words, we are going to create and design your checkout page, upsells page, down sell page, and thankyou page.
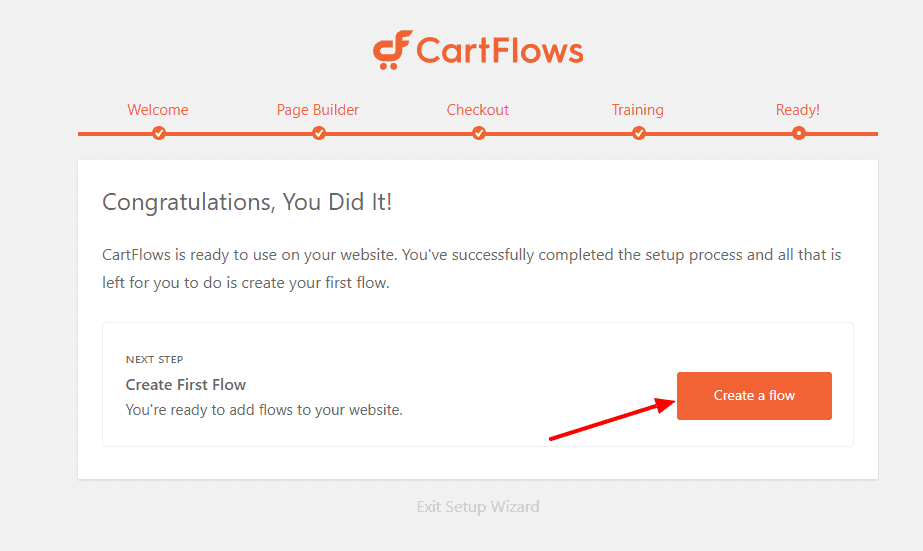
Click on the “Create a Flow” button.
Now we will create a flow for our checkout page.
4. Creating a Checkout Flow ( The Checkout Page )
Flow is basically a sales funnel or a checkout page followed by upsells, cross-sells, and thank you page. You may keep it simple or use these features to upgrade.
To create a custom checkout page for your WooCommerce website, you need to create a flow in cartflows.
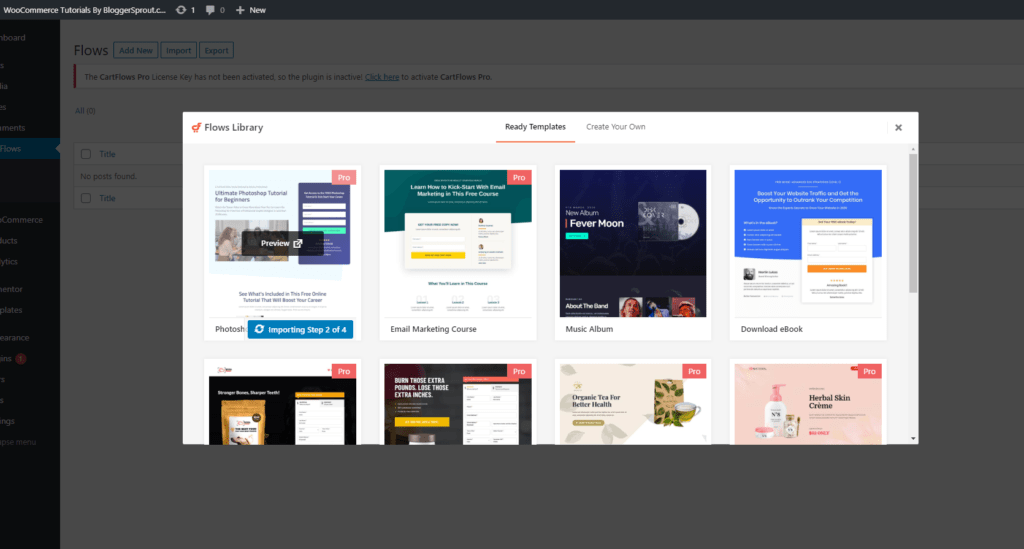
To create a flow, go to wp-admin > cartflows > Flows > add new. A new popup will appear that provides you the option to choose ready-made premium templates.
Since we have CartFlows Pro, we will import the 1st option which is a pro template.
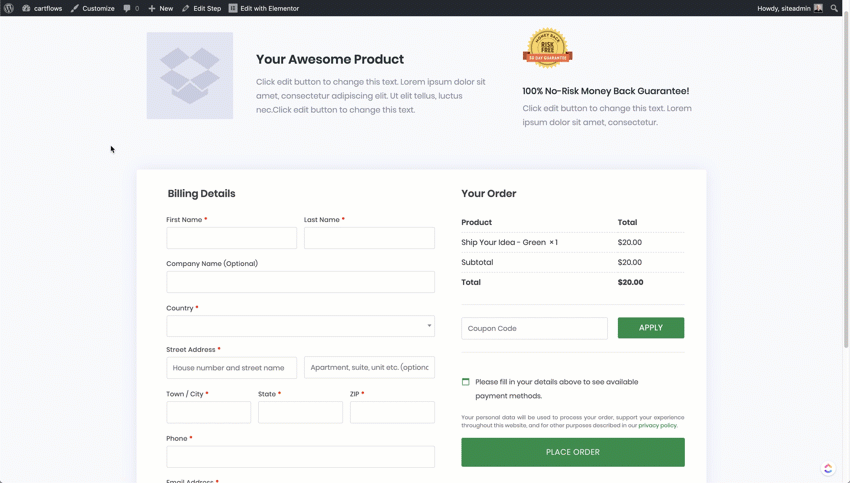
Once the import process is over, you will be redirected to the newly created flow which will look something the image below.
Now name the Flow by adding a Title and click on the update button from the right sidebar.
Once the title has been saved, now you need to work on the flow of your customized Woocommerce checkout page.
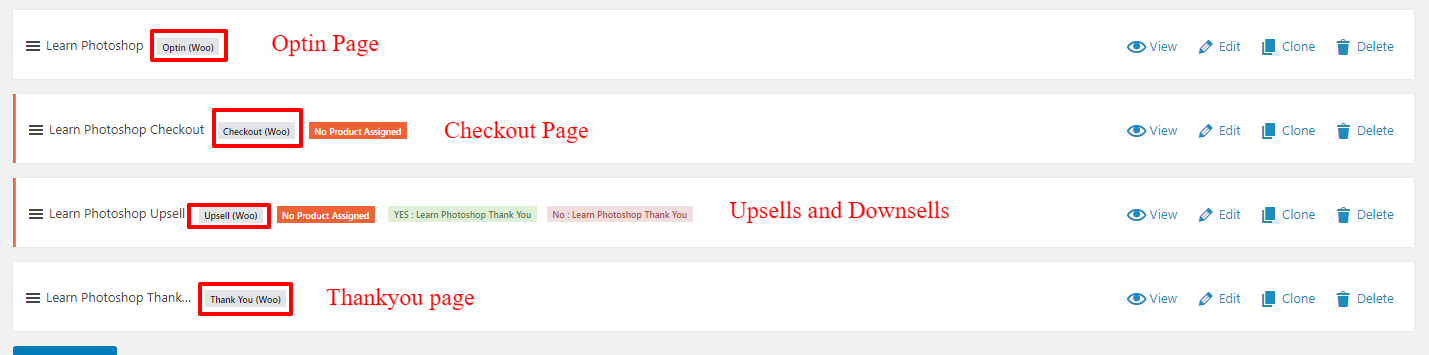
The Flow has 4 individual pages.
- Optin Page / Landing Page.
- Checkout Page.
- Upsells and Downsells Page.
- Thank you page.
If you want only the checkout page and want to get rig of the optin page, upsells and thank you page. Then click on the delete button on the right sidebar of the steps.
So in this tutorial, we will delete page number 1, 3, and 4 ( landing Page, Upsell Page, and Thankyou Page). Since we are going to focus only on the checkout page.
5. Changing the Default Checkout Page.
But wait it will not work right now. Why? because right now you have neither assigned any product for that checkout page nor you made woocommerce to use this custom checkout page instead of the boring one.
Which WooCommerce will continue using the original but boring checkout page.
Assigning Product
So by default CartFlows ask you to assign a product, so that you can have different types of custom checkout page for each product and offer different upsells, thank you page, and other options.
But if you want to use a default custom checkout page for all WooCommerce products then don’t assign any products in this step.
To use a single custom checkout page for all of your products, you need to save and update your current flow and go to CartFlows Settings.
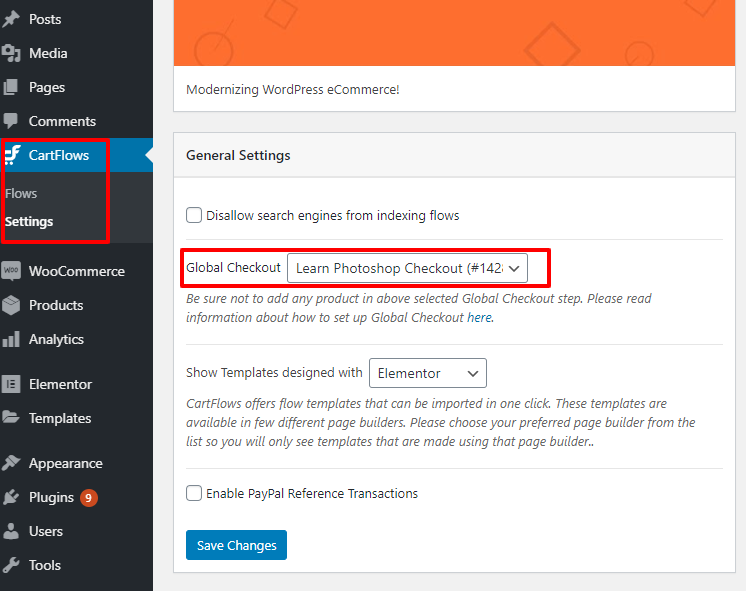
In CartFlows Settings > General Settings, you will find a dropdown with the Global Checkout options, as shown in the pic above.
Select the Flow that you have created right now. You will have only 1 flow, If you are creating for the first time.
Select that flow as your global checkout page and click on “Save Changes“. Your new custom woocommerce checkout page is now ready to be used.
Now test whether your new checkout page is working properly or not. Go to any products on your website and click on “Add to Cart” and proceed to checkout. If you see the newly created page then it means it works. Your WooCommerce payment gateways will be automatically be activated on your custom checkout page.
Do a test purchase and you are ready to rock.
6. Creating an Upsell and Thankyou Page.
Creating Upsells is really easy and is divided into 2 parts.
- Designing the upsells page
- Assigning a Product for upsells
Designing the upsells page
To Design the upsells page, open the flow and click on the edit link on that upsells column, Like the pic below:-

After clicking on the edit link, a new page will appear with an “Edit with Elementor” button and some custom fields under “Offer Page Settings“.
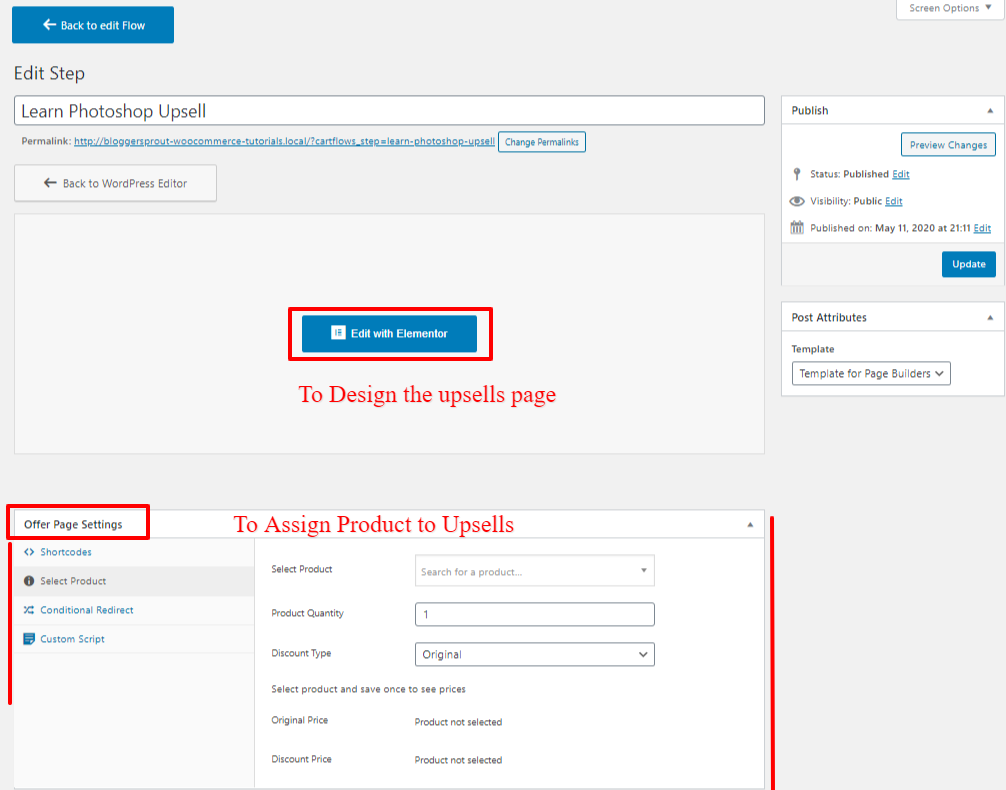
To edit the design of the page, click on Edit with Elementor and design the upsells page easily with elemetor.
A new tab will open where you can edit the design of the entire upsells page using the elementor drag and drop feature.

After you have designed the upsells page it’s time to assign a product for your upsells. So let’s do that now
Assigning a Product for upsells
Assigning a product as upsells is really easy and simple in cartflows. All you need to do is just go to “Offer Page Settings” and click on “Select Product” and type the name of the product you want to assign to the upsells page.
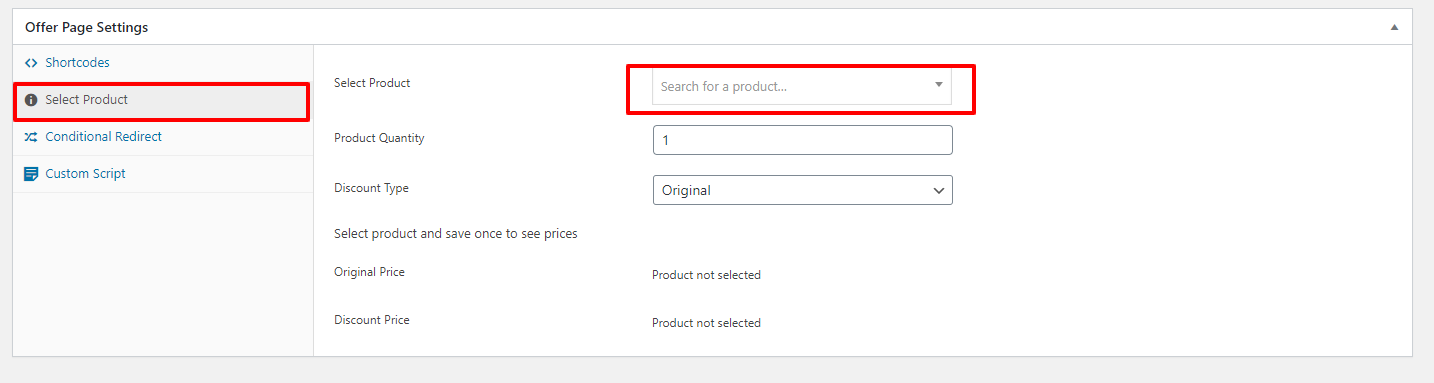
As soon as type the name of the product, the plugin will do a quick search and show you the product if you have spelled it right.

After selecting the product on the Select product field, Click on “Save Changes“. You can also edit the other option like the redirect options if the customer bought the upsell or declined it.
There are several other functions, but I think the default options are well set.
Now your upsells page is ready to use and we will move to the “Thankyou Page“.
Creating ThankYou Page
Editing the Thank you page is similar to the upsells page. To create and design your thank you page, you have to go through 2 steps:-
Creating ThankYou Page
Step:1 – Designing the Thank you Page
Click the Edit link on the Thank You step in your flow, which will redirect you to a new page.
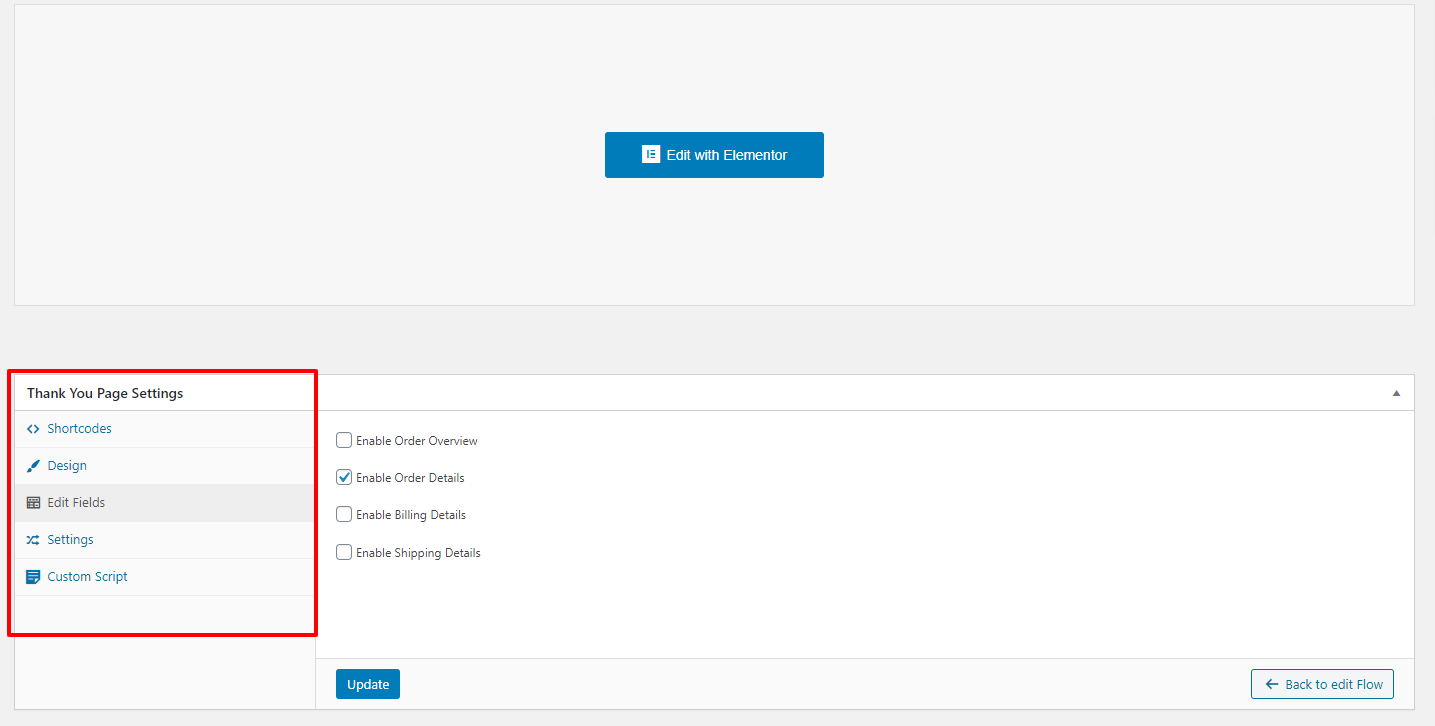
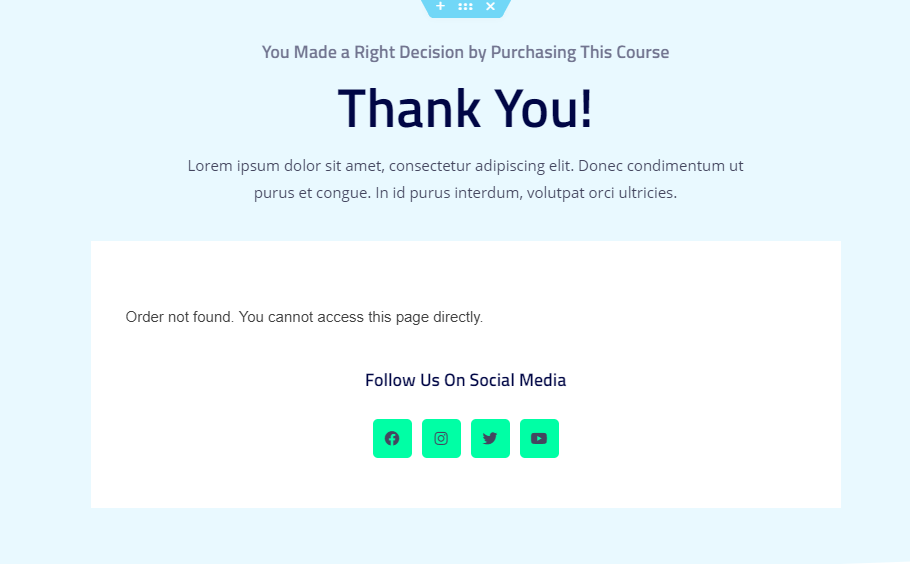
Click on the “Edit with Elementor” and edit the design of your thank you page.
Note: while editing you can’t view the details of order when successful. The Order details will only appear when an order is successful.
But I Got a Hack!
Open a New tab and order a product in test mode, when you will be redirected to the thank you page that you have designed now. When you are on the “Thank You Page“, then click on “edit with elementary” link on the top WordPress bar. And Now You can edit your thank you page with all the details shown.
So now, our Thank you page is designed, all we need to do is the settings. So what are you waiting for. Lets get the settings done.
Creating ThankYou Page
Step:2 – Editing the Settings
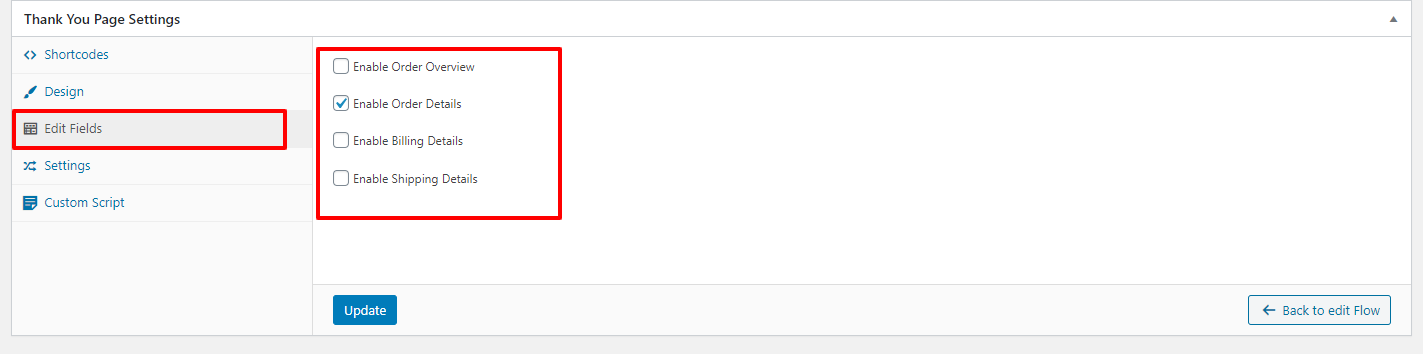
So now you have chosen the options that you want to show on your thank you page. The options are:-
- Order Overview
- Order Details
- Billing Details
- Shipping Details
So depending on your store type you may show these options. As I have a Digital store that runs on WooCommerce, so for that I don’t need to show Billing details, Shipping details.
So this is how you can Customize WooCommerce Checkout Page by yourself easily without coding.
Conclusion
We have personally found that a custom well-optimized checkout page increased the checkout and users experience. Many big companies are always testing their checkout process and are making them more friendly and optimizing the user experience.
So Its a great way to do that same those big companies are doing just by using a simple plugin that is going to benefit you in the long run.
If you have customized your checkout page then the next thing you should customize is the account page of your woocommerce.
If you have any queries, you can comment below or contact me on social media at Facebook, Twitter and Instagram. You can follow the Author on Facebook , Twitter, Instagram too.
FAQs
How to Modify woocommerce checkout page
Downloading and Installing CartFlows Pro.
Download CartFlows from https://gine.us/cartflows
Setting up the CartFlows plugin.
Choosing your Page Builder.
Creating a Checkout Flow ( The Checkout Page )
Changing the Default Checkout Page.
Thats it. Your New Checkout page is complete.

Hello, very interesting article, thank you!
Small question because I can’t customize my payment page (checkout) of my funnel on cartflow. I would like to remove the title and sidebar. But I customized this page with Elementor and I can’t find the page in the list of WordPress pages. How to do ? Thanks ::)
( TRANSLATED: Bonjour, article très intéressant merci ! Petite question car je n’arrive pas à personnaliser ma page de paiement (checkout) de mon tunnel sur cartflow. J’aimerais retirer le titre et la colonne latérale. Or j’ai personnalisé cette page avec Elementor et je ne trouve pas la page dans la liste des pages de WordPress. Comment faire ? Merci ::) )
Hi, The funnels will not show on pages.. It will appear on Cartflows.
Secondly, you will need to select the Template as Full Width or CartFlows
Regards
Niraj
( TRANSLATED: Bonjour, Les entonnoirs ne s’afficheront pas sur les pages. Ils apparaîtront sur Cartflows.
Deuxièmement, vous devrez sélectionner le modèle en pleine largeur ou CartFlows
Salutations
Niraj )