How To Add Table of Content to WordPress
Every blogger writes and publishes great articles and posts on their websites. But the sad thing is that only a few blogger get success.
Blogging is not just about writing articles or having a good design for the blog. You should learn the small techniques of blogging that can help you get success in the long run.
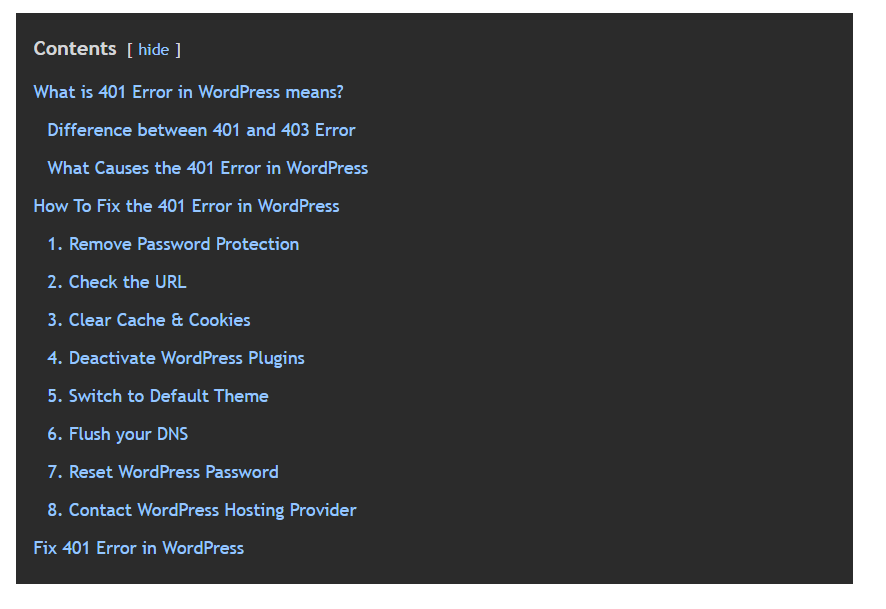
A table of contents is a small list of contents that are arranged hierarchically based on your article formatting and arrangement. It also helps the user to easily navigate the selected information easily.
Table of content is widely used by bloggers and Wikipedia. It can filter your posts based on H1, H2, H3, H4, H5, H6.
Disclosure: I may receive affiliate compensation for some of the links below at no cost to you if you decide to purchase a paid plan. You can read our affiliate disclosure in our privacy policy.
-How To Add Table of Content-
Table of content can be added very easily using WordPress. There are several plugins available in the WordPress Repository.
How To install Table of Content?
To install the table of content. Go to
WP-Admin -> Plugins -> Add New -> Search -> Lucky table of Content.
Click on Install and Activate.
After the plugin is installed and activated. You just need to add it to the post you want the table of content to appear.
-Adding Table of Content to Posts-
Table of Content can be manually added to the post you want or you can also automatically add to all the posts that you have written.
Table of content provides the option to add automatically to every post by just activating the option.
The table of content is added after a certain number of paragraphs automatically if you have activated the option.
That’s how you can add the table of content to your posts
-How to configure Table of Content –
the settings of the table of content is very easy. It options are pre-filled and you don’t need to edit or change it. But if you want to change it then here is the details.
- Position: This is where the table will be shown in the blog post. The position is set to default, which means that the TOC will appear before 1st paragraph.
- Show When: This setting limits the table of content to when to appear depending on the number of heading in your posts.
- Auto Insert: Where you want to auto-insert the table of content in post or pages.
- Heading text: The heading for the table of content
- Show Hierarchy: This option seperates the heading and sub-heading structure of your posts.
- Number list item: This option sets the number listing for the TOC.
- Enable smooth scroll effect: This is a setting that will enhance the experience of the reader by allowing the smooth scroll to the selected heading in your post.
- Width: To set the width of the table of content. By default Auto.
- Wrapping: This allows you to display the table box either on left or right.
- Font Size: These settings allow you to override the default font size of the table of content.
- Advanced: This setting allows you to have advanced control of the table of contents. Like custom css, Lowercase, uppercase etc.
Conclusion
That’s all.
However, your needs may be different from mine. Which plugin is your favorite, and are you currently using it on your site? Do you have any other recommendations to add? Please voice your thoughts in the comments below!
You can also subscribe to our YouTube and Like and Follow us on Facebook, Twitter, and Instagram.


Hi! Nice tips, I will apply this to my blog site.
Thanks for sharing.
Welcome Abdullah