How To Move Or Backup Your WordPress Website With The WordPress Duplicator Plugin
Most of the people don’t backup up their website and regret later when something goes wrong with their WordPress website and probably you are going to regret it to unless you follow my tips. Hey everyone, I’m Niraj Kashyap and I am going to show you how you can WordPress Duplicator Plugin to backup your files and keep it safe and with a single click restore your entire website if anything goes wrong.
Recently one of my our readers, Sahil asked me how he can backup his website for free using wordpress duplicator and move his website to other hosting if you like in the future.
So in this tutorial, I am going to show you the exact steps to backup your WordPress website or move your WordPress to another hosting.
You may have heard about the duplicator plugin for WordPress and if you don’t, use the link below and check it out.
The best part of this plugin is that it helps you move your entire WordPress website to another server with the simple click of a button.
So if you have imported and exported any WordPress website manually then you know all the hassle you need to deal with all the task of importing your databases, media file, importing the theme and its settings and the list goes on.
Disclosure: I may receive affiliate compensation for some of the links below at no cost to you if you decide to purchase a paid plan. You can read our affiliate disclosure in our privacy policy.
An overview of duplicator plugin
WP Duplicator plugin provides you an entire list of everything you need to backup your WordPress website.
You don’t need to worry about backing your databases, images, plugin one by one, Duplicator plugin take care of all the things.
While it’s simple to use the duplicator WordPress plugin it’s a little confusing at first so I decided to help you with this tutorial.
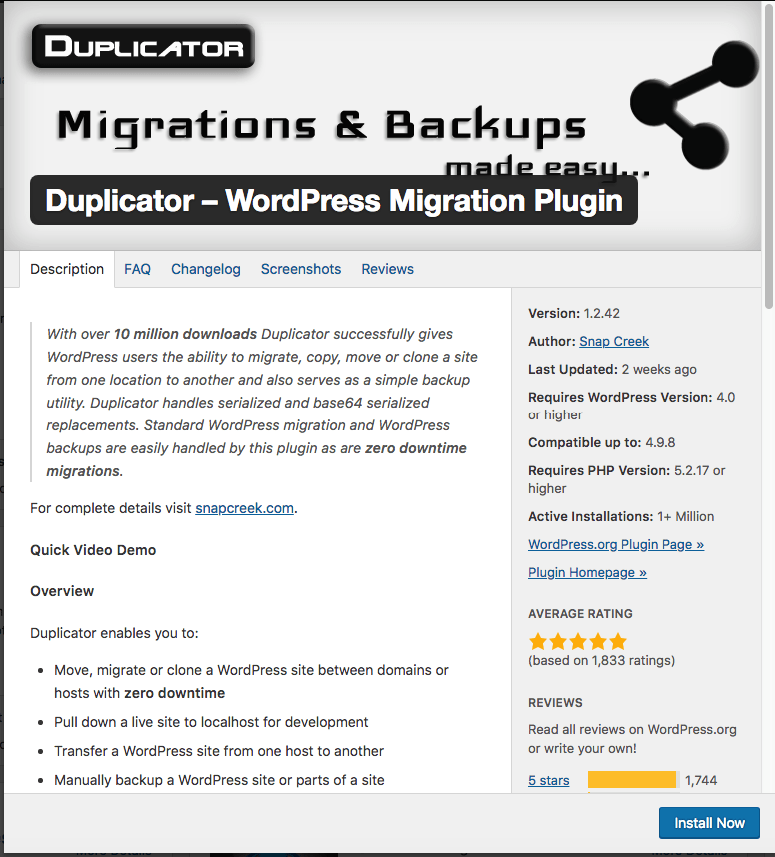
1. Download and install the Plugin
WordPress Duplicator plugin can be installed from your WordPress dashboard by visiting plugins > install plugin and search for “duplicator”.
The plugin you’re looking for should be the first result where the author is lifeintheGrid.
Just click the install button and activate the plugin.
2. Activate the Plugin and Create a Site Package
So now you have successfully activated the plug and then click the duplicate menu on the left side of the WordPress menu.
Select it and you will be welcomed with the main setup screen that promises you to create a package.

Click on the create a new tab and this will take you to the package creation wizard.
So before you can create a package, the plugin will show you the requirements that you need to run this plugin and all the marks should be pass and should be in the green.
Once all the test has been done and your requirements have been made, Fill all the required information that the plugin asks.
Under the instructions, you will be asked to enter the database details like the hostname Database user and password, leave it blank for now. You don’t need to change any other settings in this section or this page.
Just click the skip button and proceed to the next step.
[ Note: If you are an advanced user and you know how WordPress works, then you can go and change these settings according to your need but if you are a newbie or you are using the duplicate plugin for the first time I recommend you to skip these settings which have been mentioned above]
Finally you will have an option of skipping the system scan and going directly to the package build, however, I would leave this and check so that you are aware of any potential problems that may arise.
Now the plugin will automatically perform a scan of the server, files, and database to detect any possible issues. Some of your checks may fail, don’t worry it can happen.

If you have faced any problem or any of the security checks has gone wrong, you can click on the more information button to know what has gone wrong.
Now click on the build button, the software will go ahead and back up your whole WordPress website, which includes plugins, themes, pages, post, media and any other files to a single file.
Once the build is finished, you will be represented with the download button for the installer which is a PHP file and the archive file which is just created in the zip format.
So go ahead and download this file.

The packages will now be listed on the package step with the date and size information. if you want to run manually, you can grab all the packages which are stored in WP snapshots the directory in your main WordPress directory.
Well, your backup is done.
For extra security reasons I would recommend you to download this archive file and the PHP file to an external hard drive or hard disk or in a cloud drive
3. Steps to Move on to Another Server
[ Note: Only follow this below steps if you want to move your WordPress website to another server or another cPanel or another hosting company ]
Prepare a New Server for Installation
So depending on your website, this process can take some time. go to new hosting and access the cPanel or via an FTP.
Upload the PHP file and the archive file in the directory where you want your WordPress to be installed/ moved.
You can upload the files and the zip file using the cPanel uploader or an FTP. Please not do not install WordPress on the new server.
Once the upload has been done go to your cPanel main dashboard, and search for PHP my admin or my SQL database and create a new database.
WP duplicator plugin does not help you to create a new database on a new hosting server you need to do it manually.
If you face any problem on creating a new database comment on below and I’ll be ready to help you.
Once you have created your New database not done the credentials like the username password and the database username. Also, make sure that the user has the full privilege for the database.
4. Run the Installer
Access the installer script which is the PHP file you have downloaded earlier from your new website URL. Example www.yournewsite.com/installer.PHP
If you have uploaded everything correctly then you would be welcomed with installer screen something like the image below.

Fill out the fields with the information for the database you just created, this should be your New database details.
Once you fill all the pieces of information, click on the test connection button and check whether the script can connect to your database. If all the settings is correct you will get a popup displaying that your connection was successful.
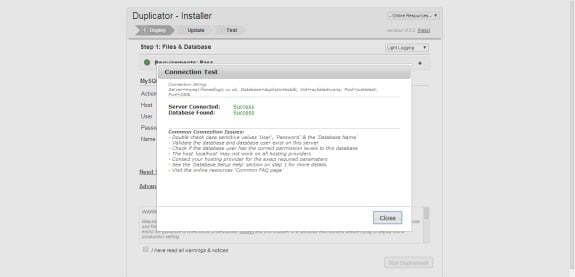
Once the connection was ok and passed the popup will display the deploying of files.
After all the files have been successfully deployed and the WordPress is installed you will be presented with a page showing the information of your old and new path URL settings for your site.
And finally you will be displayed with the report of the installation displaying all the errors update warnings and some steps did you should complete before using your new site

Now click on the set permalink button. You will be redirected to WordPress dashboard once you click the save permalink button.
I recommend you to use your old permalink structure so that you don’t mess up with your SEO and search rankings.
Duplicator plugin will ask you to delete some files for security purpose, go to cPanel directory or use an FTP program to delete the files

so now everything is done you have successfully backed up your website and also moved it to a new server
Congratulations
Now visit your front end then of your website and make sure that everything works fine.
Conclusion
Duplicator plugin is really simple to use but can be tricky for some new users.
This plugin also helps you to create backup and has an additional functionality to duplicate your website on a new server how to create a Staging website in a different location if you want to customize your website without risking your live website.
If you just want to use this plugin to create a backup you should follow this guide till step 2.
From Step 3 onwards the guide is on how you can use this plugin to move your WordPress website from one server to another server or other hosting company.
As WordPress plugins are regularly updated, some of the settings may have changed. but don’t worry everything will work fine like this like I said in this guide.
If for any reason you face any problem you can comment on this guys or you can just hit me up on Facebook, Twitter, YouTube or our member’s forum.
From my perspective, this WordPress duplicator plugin is really a fantastic plugin and should be mainly used for duplicating a WordPress website.
Who should use this Duplicator plugin?
- Someone who wants to move their website from one hosting server to another
- someone who is a WordPress theme or plugin developer
- someone who wants to customize their website without messing up the live website
- someone who wants to back up their website to another server.
Let me know how’s your experience with duplicator WordPress plugin, and if you would like to suggest any alternative of migrating the file from one server to another, let me know in the comments below.
And finally, don’t forget to share this guide with others on your social networking sites.