How to Add Web Push Notifications to Your WordPress Site
Do you want to add push notification to your WordPress site. Push notifications are very common these days and you have seen in apps and in almost all websites. Popular websites like Facebook Google and several others also use push notifications.
Disclosure: I may receive affiliate compensation for some of the links below at no cost to you if you decide to purchase a paid plan. You can read our affiliate disclosure in our privacy policy.
So why should you use Web Push Notification?
Push notification allows you to send a notification to users when they are not visiting your website. Even if your content is interesting you need to find a way to hook readers and stay in touch with them.
In this article, we will show you how to easily add web push notification to your WordPress site. We will also talk about the best WordPress push notification plugin which is free and how to send Web and mobile push notifications from your WordPress site.
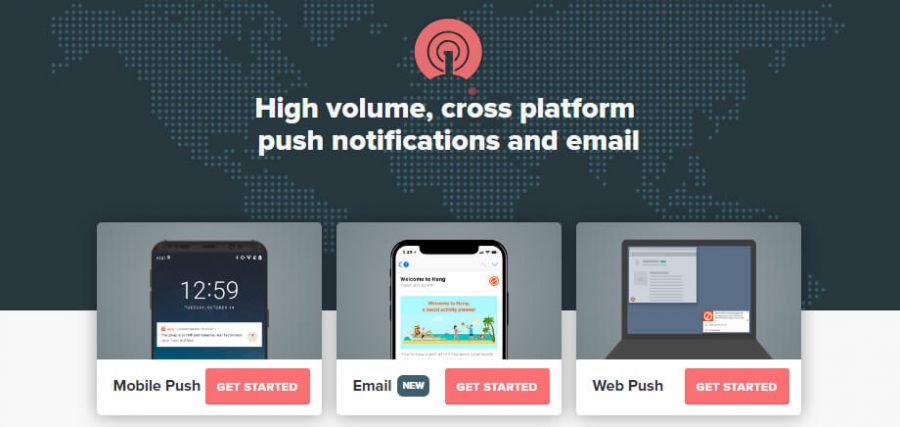
What is a push notification?
Push notifications are mostly clickable notifications that your website sends to a computer, browser, App or a mobile device. It is a relatively new marketing strategy that are mostly used by big companies like Google, Facebook and several others which allows you to send marketing messages to your site visitors on their website even if it’s in their desktop all in their mobile even after the closes your website.
Here are a few benefits of Push Notification.
- It has the highest rate of opt in.
- It has very less unsubscribe rate.
- It is flexible and almost works on all device.
- It has the highest attention pull rate.
- It allows visitors to take direct action on the notification.
Which is the best free push notification for WordPress?
So in this article, we will be using OneSignal push notification which is free and works great.
How to install OneSignal push notification?
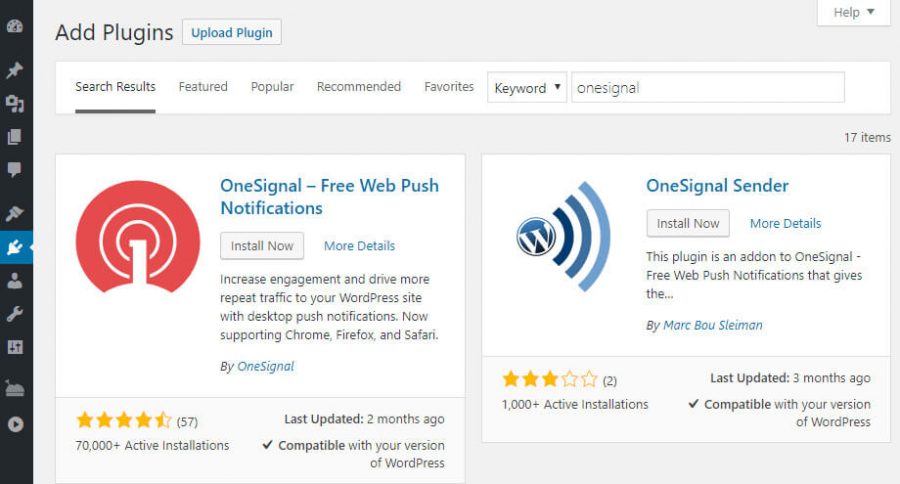
In order to set up the OneSignal push notification, you will need to download the OneSignal WordPress plugin. Go to your WordPress admin, click on plugins > Add New and search for the plugin “OneSignal“.
Click on install and Activate.
so once the OneSignal push notification is installed, it’s easy as Pie to set it up and get started.
How to configure the OneSignal push notification in your WordPress?
OneSignal WordPress Plugin has plenty of features and it’s quite easy to configure and use it. To configure OneSignal push notification, click on the OneSignal push on your WordPress admin menu which will be on your left side ( see the screenshot below)
So when you click on the OneSignal push, from the admin menu you will receive two tabs. The first is the setup and the other is the configuration.
Basically, the setup helps you to set up the OneSignal plugin but in a not so easy way. So for that reason, we have created this guide.
Step 1# Create a free OneSignal account
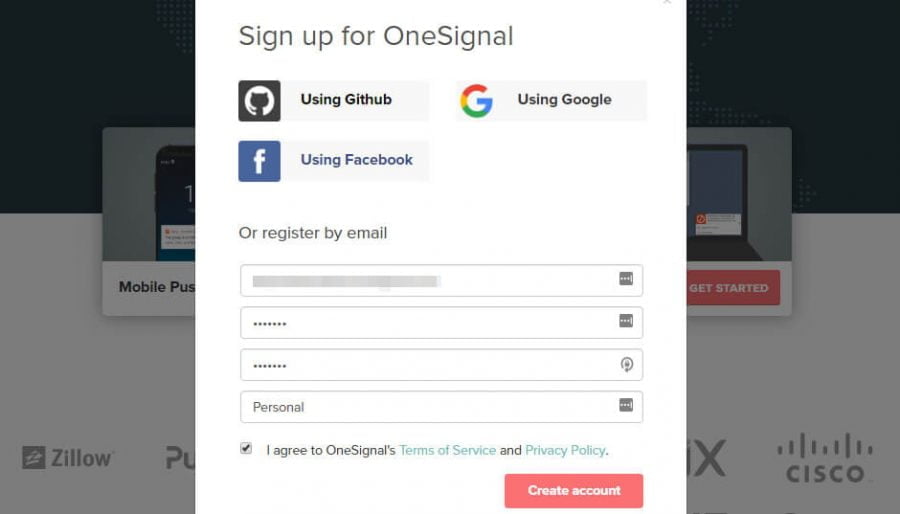
So the first thing that you are going to do is creating a free OneSignal account. Click to get your free OneSignal account.
When you have visited the onesignal.com you will see a short sign up form just filled the form with your email, password and the company name and then hit the create account button or alternatively you can be lazy like me and you can just click on the Google, Facebook or the GitHub options to create your account without filling out those forms.
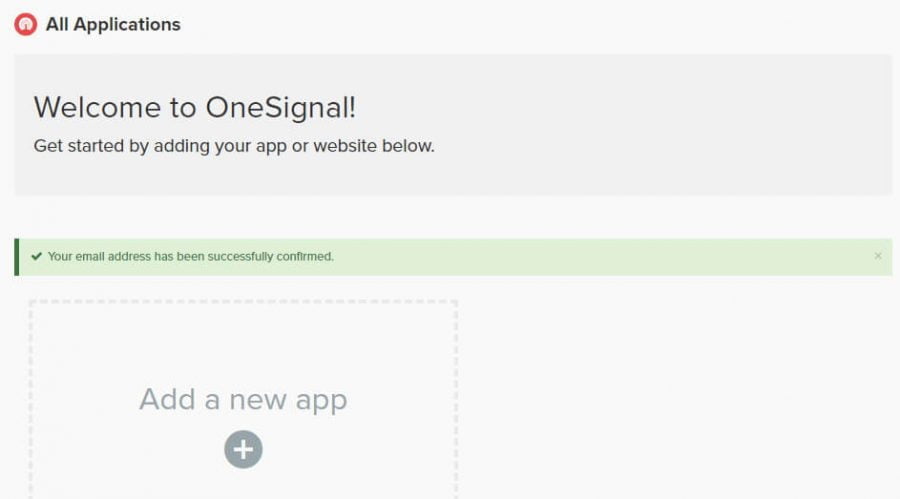
After Successful registration, OneSignal will ask you to check your email in order to activate your account.
Open your email ID and click the link that has been sent by the OneSignal to verify your email id and activate your account.
Once your account is activated you will be greeted with an on-boarding tutorial from OneSignal, simply skip it. After you have skipped the on-boarding process you will be redirected to the dashboard.
Now click on the add App button from your dashboard and fill out the name of your App. Basically, it will be your website name with some prefix or suffix.
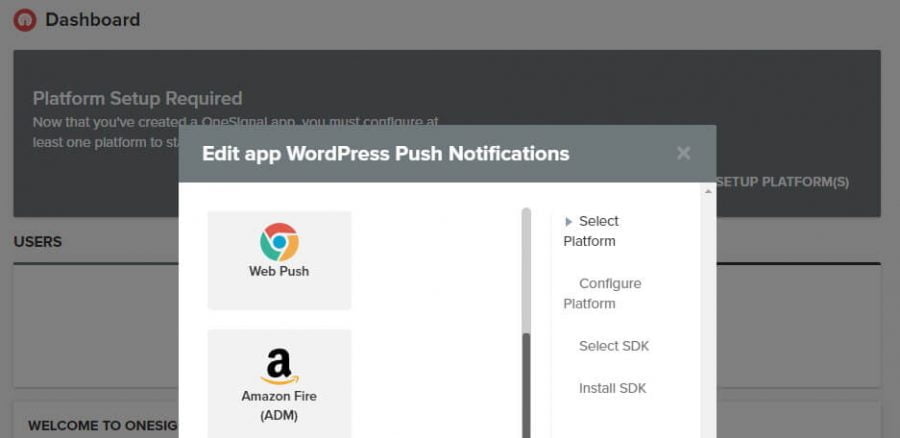
Once you set your name for the app click on the add app, on the next screen, select web Push and click next button as shown in the screenshot above.
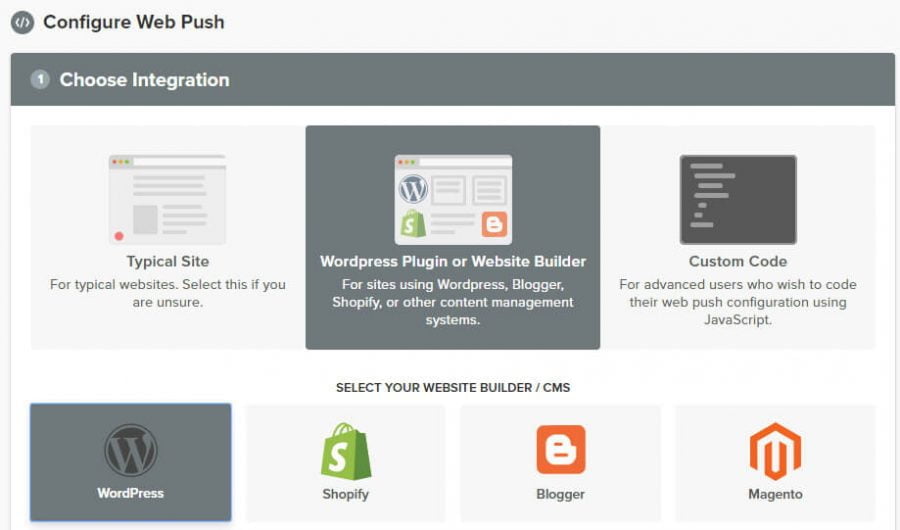
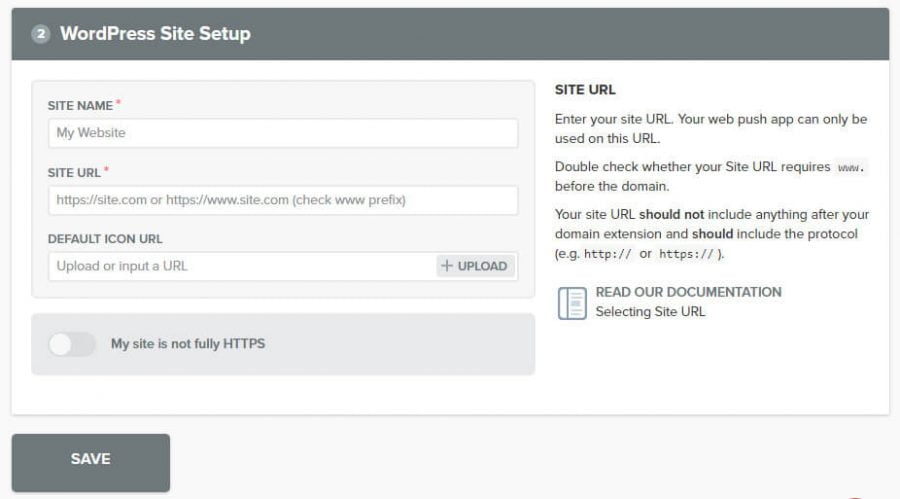
After that, you need to choose the platform so, for us it will be WordPress. Next scroll to the bottom of the page filled the form upload your icon and hit the save button.
After clicking on the save button you will be welcomed with app ID and API key. Copy both of them one by one and paste it in your WordPress OneSignal configuration tab.
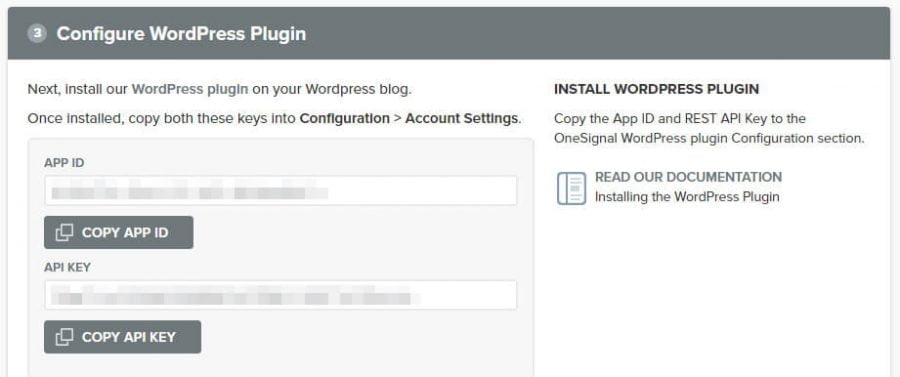
Which you can access simply by clicking on OneSignal push and Choosing configuration.
Copy and paste both of the keys in their respective field.
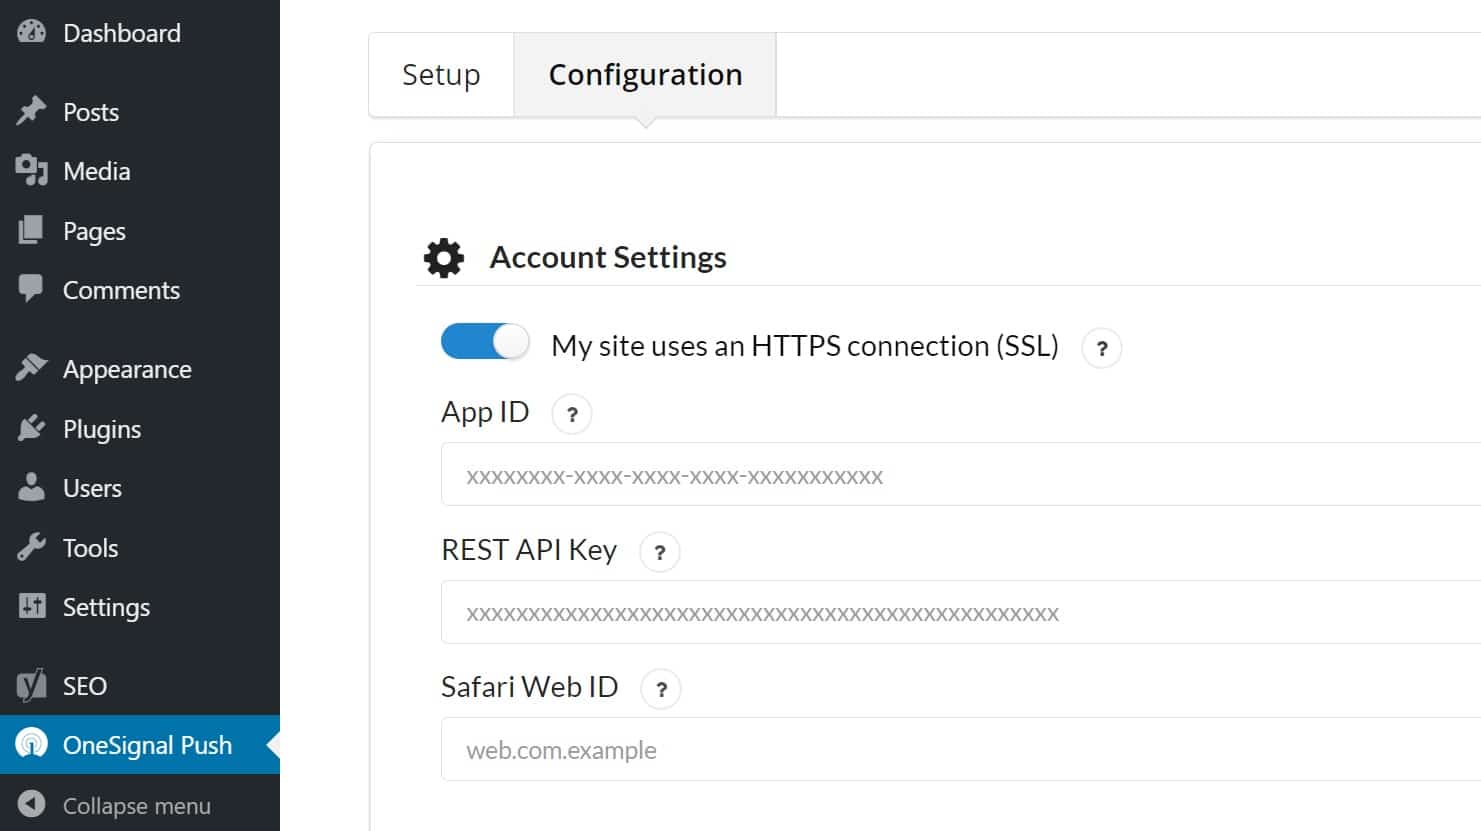
Once you have pasted the API key and the app key hit the next and scroll towards the bottom of the page and hit the save button.
Hurray, that’s done now your website is pushing notification on all the supported browsers. but wait it’s not done, OneSignal push most of the notification in Chrome and Firefox but it will not post the notification to Safari.
In order to post your notification to Safari you need to add another key and you can get the same in just few steps.
Configuring OneSignal push notification for the Safari Browser.
So in order to activate the Safari push notification, you need to head offered to the OneSignal dashboard and click on the app that you have created.
Click on the settings then on Apple Safari under web-push platforms

Next, fill out the popup that appears and hit the save button.
Once you have saved the Apple Safari form you will see that Apple Safari has a new icon it says active
Click on the Apple Safari once more which will bring you to another popup where you can see your web ID mentioned on the top of it.
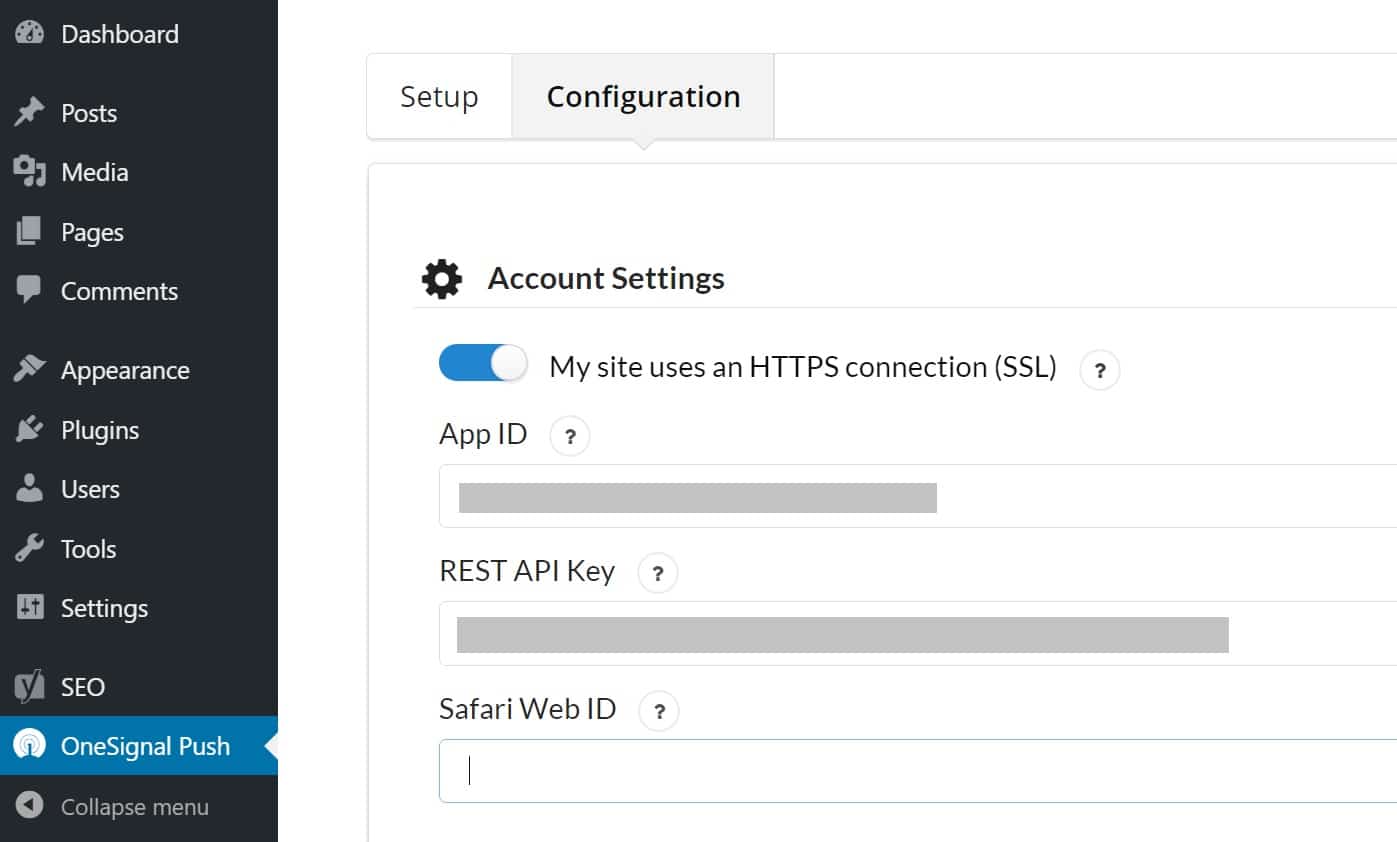
Just Copy it and paste it to your WordPress OneSignal Push > configuration and paste it there.
Once we’re pasted all the required information, scroll below and click the save button.
Now your OneSignal push notification is active and supported on all major browsers, and the best part is that one signal account supports up to 30,000 web subscribers and that’s for free.
Conclusions
A great way to stay in touch with your visitors and also to bring back your all visitors who have subscribed to your push notification.
Push notifications allow you to bring back your audience and perform specific actions or bring a specific audience to a specific page.
There are several other plugins available like the subscriber.com and many others, but out of all of them, onesignal is the best as it has the best free options available which support up to 30000 web subscribers and unlimited for mobile subscribers.
If in future you think you need to upgrade and get more features and more powerful than its package starts from just $99 per month
If you have any questions about web push notification feel free to comment below on this post and if this post has helped you then please share with your friends and comment below how it help you on which and on which of you which website.